

Hey there! As a supplier of Feed Pellet Mills, I'm stoked to walk you through the installation process of these awesome machines. Whether you're into making feed for poultry, rabbits, or other animals, understanding how to install a Feed Pellet Mill correctly is super important. So, let's dive right in!
Pre - installation Preparations
Before you even start unpacking the Feed Pellet Mill, there are a few things you need to take care of. First off, find a suitable location. The area should be flat, well - ventilated, and have enough space around the mill for easy operation and maintenance. Make sure the floor can support the weight of the machine. A concrete floor is usually a great choice.
Next, gather all the necessary tools. You'll typically need wrenches, screwdrivers, and maybe a level. It's also a good idea to have a clean, dry cloth handy to wipe down the parts as you install them.
Check the shipping package carefully for any signs of damage. If you notice anything amiss, contact the shipping company right away. Inside the package, you should find the Feed Pellet Mill, its components, and an instruction manual. Go through the manual thoroughly to familiarize yourself with the parts and the installation steps.
Unpacking and Inspecting the Parts
Once you've found a good spot and have your tools ready, start unpacking the Feed Pellet Mill. Lay out all the parts on a clean surface. You'll likely see the main body of the mill, the motor, the die, the rollers, and various other small parts.
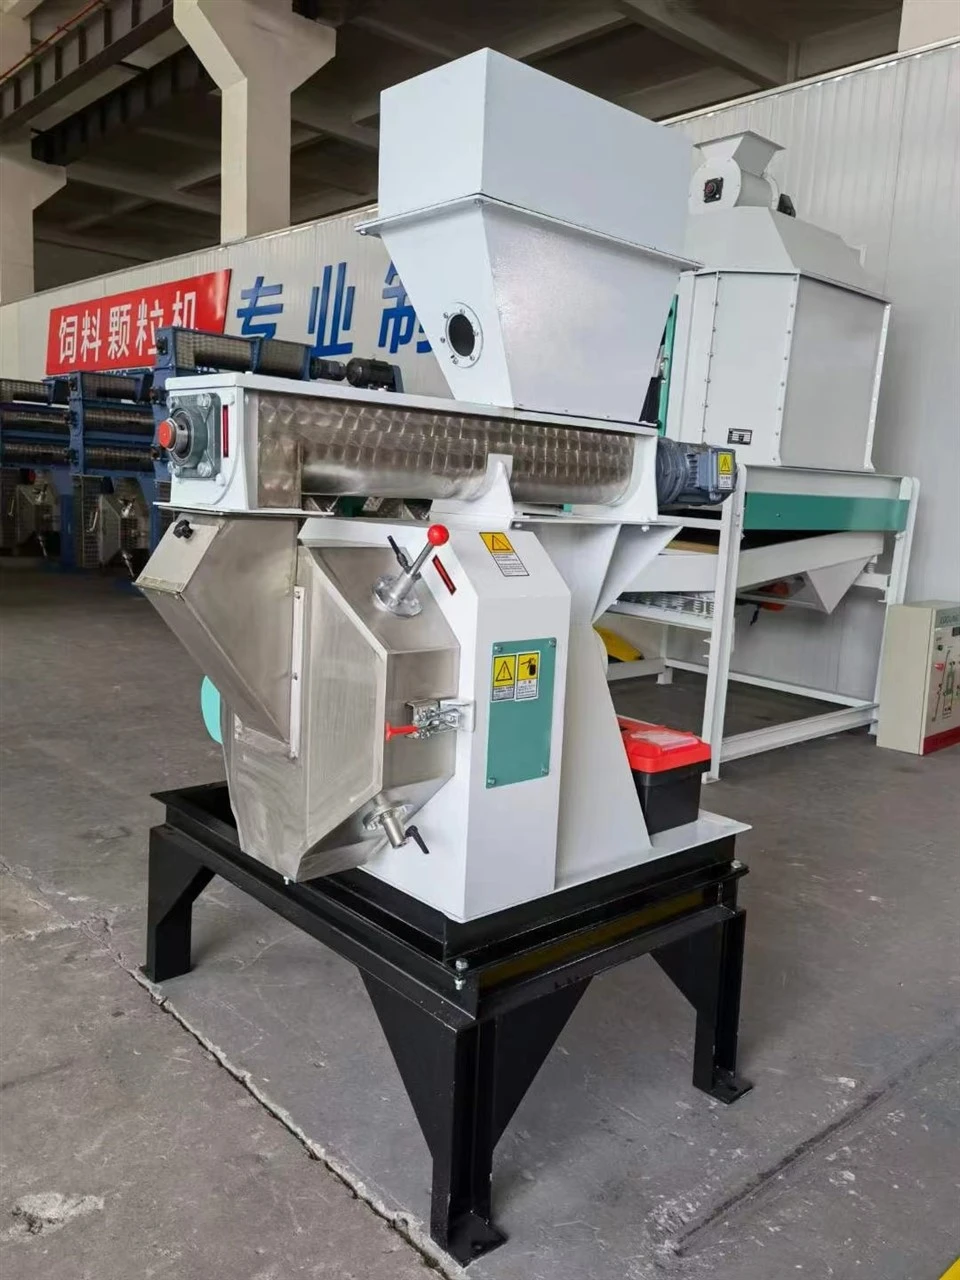
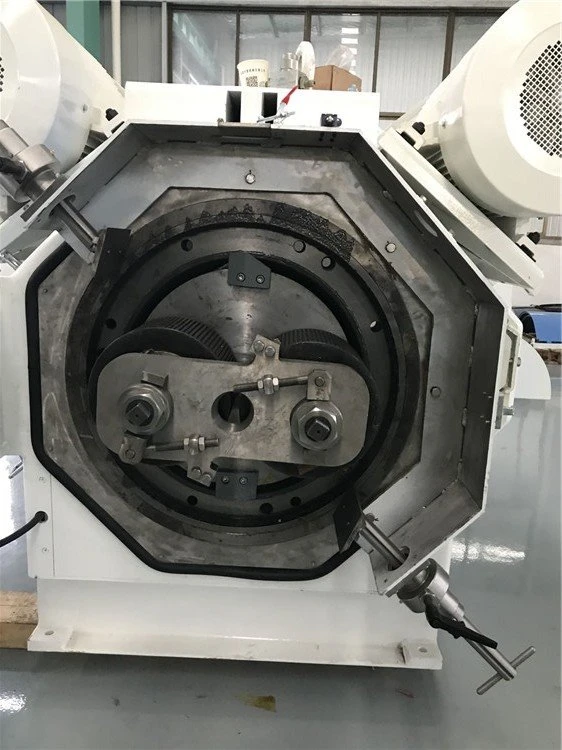
Inspect each part closely for any defects. Look for cracks, dents, or any signs of wear and tear. If you find any issues, reach out to us, the Feed Pellet Mill supplier. We'll be more than happy to help you sort it out.
Installing the Main Body
Now, it's time to install the main body of the Feed Pellet Mill. First, place the main body on the pre - selected location. Use a level to ensure it's perfectly horizontal. If it's not level, the mill may not operate smoothly and could cause problems down the line.
Secure the main body to the floor using the appropriate bolts. Make sure the bolts are tightened properly, but don't over - tighten them as this could damage the floor or the machine.
Connecting the Motor
The motor is a crucial part of the Feed Pellet Mill as it provides the power needed to run the machine. Connect the motor to the main body according to the wiring diagram in the instruction manual. Be extremely careful when dealing with electrical connections. If you're not confident in your electrical skills, it's best to hire a professional electrician.
Once the wiring is done, double - check all the connections to make sure they're secure. Loose connections can lead to electrical problems and even pose a safety hazard.
Installing the Die and Rollers
The die and rollers are responsible for shaping the feed into pellets. Install the die into the mill according to the instructions. Make sure it's properly aligned and seated. Then, install the rollers. Adjust the gap between the rollers and the die as recommended in the manual. This gap is important as it affects the quality and size of the pellets.
Attaching Additional Components
Depending on your specific Feed Pellet Mill model, there may be additional components to install. For example, if you have a Poultry Pellet Mill, there might be special attachments for handling poultry feed. Or, if you're using a Stainless Steel DDC Conditioner, you'll need to connect it to the main mill.
Attach these components carefully, following the step - by - step instructions in the manual. Make sure all the connections are tight and secure.
Testing the Machine
After all the parts are installed, it's time to test the Feed Pellet Mill. Before you start the machine, do a final check of all the connections and components. Make sure everything is in place and there are no loose parts.
Turn on the power and let the machine run for a few minutes without any feed. Listen for any unusual noises or vibrations. If you hear anything strange, turn off the machine immediately and check for the cause.
Once you're satisfied that the machine is running smoothly, start feeding a small amount of raw material into the mill. Observe the pellet production process. Check the quality of the pellets, such as their size, shape, and density. If there are any issues, refer to the troubleshooting section in the manual or contact us for assistance.
Maintenance Tips
Proper maintenance is key to keeping your Feed Pellet Mill in top condition. Regularly clean the machine to remove any feed residues. Lubricate the moving parts as recommended in the manual. Check the belts and chains for wear and replace them if necessary.
Conclusion
Installing a Feed Pellet Mill may seem like a daunting task at first, but if you follow the steps carefully and take your time, it can be a smooth process. Whether you're using a Poultry Pellet Mill, a Stainless Steel DDC Conditioner, or a Rabbit Pellet Making Machine, we're here to support you every step of the way.
If you're interested in purchasing a Feed Pellet Mill or have any questions about the installation process, don't hesitate to reach out to us. We're always ready to have a chat and help you make the right choice for your needs.
References
- Feed Pellet Mill Instruction Manual
- Industry standards for Feed Pellet Mill installation and operation