

A feed hammer mill is an essential piece of equipment in the feed processing industry. As a trusted feed hammer mill supplier, I understand the importance of correct installation to ensure the efficient and safe operation of the machine. In this blog, I will guide you through the step - by - step process of installing a feed hammer mill correctly.
Pre - installation Preparation
Before you start the installation process, it is crucial to make thorough preparations. First, choose a suitable location for the feed hammer mill. The site should be flat, well - ventilated, and have enough space for the machine and its associated equipment. Ensure that there is easy access to power sources, water sources (if required for cooling), and transportation routes for raw materials and finished products.
Next, check all the components of the feed hammer mill. As a supplier, we ensure that all parts are in good condition and free from damage during shipping. However, it is still necessary for you to conduct a final inspection. Verify that all the hammers, screens, bearings, and other key parts are present and undamaged. You can refer to the product manual provided by us to identify each component correctly.
Foundation Installation
Once you have chosen the location, the next step is to install the foundation. The foundation is the base that supports the feed hammer mill and reduces vibration during operation. For small - scale feed hammer mills, a simple concrete floor may be sufficient. However, for larger and more powerful models, a specially designed foundation is required.
Mark the position of the foundation according to the dimensions of the feed hammer mill. Dig a pit with the appropriate depth and size, usually around 30 - 50 cm deep depending on the machine's weight and size. Reinforce the pit with steel bars if necessary. Then, pour the concrete into the pit and level it. Use a spirit level to ensure that the surface of the concrete is perfectly horizontal. Allow the concrete to cure for at least 7 - 10 days before proceeding with the next steps.
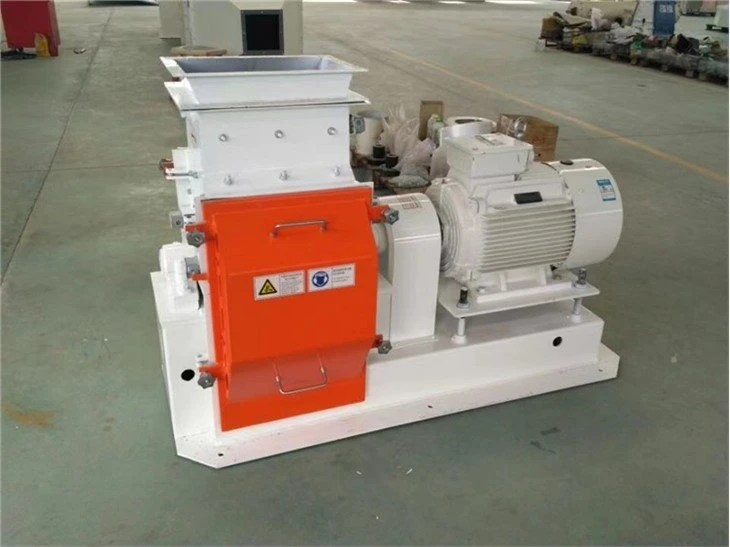

Mounting the Feed Hammer Mill
After the foundation has cured, it's time to mount the feed hammer mill on the foundation. Use a crane or other lifting equipment to carefully lift the machine and place it on the foundation. Align the mounting holes on the machine with the anchor bolts embedded in the foundation. Insert the anchor bolts through the holes and tighten the nuts gradually. Make sure the machine is firmly fixed on the foundation to prevent any movement during operation.
Electrical Connection
Proper electrical connection is vital for the safe and efficient operation of the feed hammer mill. First, determine the power requirements of the machine, which are usually specified in the product manual. Connect the power cable to a suitable power source, ensuring that the voltage and frequency match the machine's requirements.
Install a dedicated circuit breaker or fuse to protect the machine from over - current and short - circuit. Connect the grounding wire to the machine to prevent electrical shock. It is highly recommended that you hire a professional electrician to carry out the electrical installation to ensure compliance with safety standards.
Belt and Pulley Installation
Most feed hammer mills are driven by belts and pulleys. Check the belt tension and alignment before installation. Loosen the motor mounting bolts and adjust the position of the motor to achieve the correct belt tension. The belt should be tight enough to transmit power effectively but not too tight to cause excessive wear on the bearings.
Align the pulleys on the motor and the feed hammer mill shaft. Use a straightedge to ensure that the pulleys are in the same plane. Incorrect alignment can lead to belt slippage, reduced efficiency, and premature wear of the belts and pulleys. Once the alignment is correct, tighten the motor mounting bolts.
Screen and Hammer Installation
The screen and hammers are key components that affect the grinding quality of the feed hammer mill. Install the screen according to the desired particle size of the finished feed. Different screens have different hole sizes, and you can choose the appropriate one based on your production requirements.
When installing the hammers, make sure they are evenly distributed around the rotor. The hammers should be firmly fixed to prevent them from falling off during operation. Check the balance of the rotor after installing the hammers. An unbalanced rotor can cause excessive vibration and damage to the machine.
Testing and Commissioning
After all the installation steps are completed, it's time to test the feed hammer mill. Before starting the machine, remove any tools or foreign objects from the vicinity of the machine. Check all the connections again to ensure they are secure.
Start the machine and let it run idle for a few minutes to check for any abnormal noises or vibrations. If everything seems normal, gradually feed a small amount of raw materials into the machine. Observe the operation of the machine and the quality of the ground feed. Adjust the parameters such as feed rate and screen size if necessary.
Maintenance and Troubleshooting
Regular maintenance is essential to keep the feed hammer mill in good working condition. Clean the machine regularly to remove dust and debris. Check the wear of the hammers and screens and replace them when necessary. Lubricate the bearings according to the manufacturer's recommendations.
In case of any problems, refer to the troubleshooting guide in the product manual. If you encounter serious issues that you cannot solve on your own, contact our technical support team. As a reliable feed hammer mill supplier, we are committed to providing you with comprehensive after - sales service.
Different Types of Feed Hammer Mills
We offer a variety of feed hammer mills to meet different customer needs. For example, our Fish Feed Hammer Mill is specially designed for grinding fish feed. It can produce fine - grained feed that is suitable for fish digestion.
Our Fine - grinding Hammer Mill is capable of producing extremely fine particles, which is ideal for applications where high - quality feed is required.
If you are in the cattle farming industry, our Hammer Mill for Cattle is a great choice. It can efficiently grind various types of cattle feed, improving the palatability and digestibility of the feed.
Conclusion
Installing a feed hammer mill correctly is a complex but crucial process. By following the steps outlined in this blog, you can ensure that your feed hammer mill operates safely and efficiently. As a feed hammer mill supplier, we are always here to provide you with high - quality products and professional technical support. If you are interested in purchasing a feed hammer mill or have any questions about installation and operation, please feel free to contact us for further discussion and negotiation.
References
- Feed Processing Machinery Handbook
- Manufacturer's Manual for Feed Hammer Mills